
Environmental HazardsReport
English:Environmental Hazards · Game Mechanics
Acid rain, acid ground, acid water, gas clouds, orbital beams and dust storms — in Kenshi the map itself is the enemy. Skeletons and animals are wholly immune, Hivers are immune to acid, and humans and Shek have to buy their way through with gear.
Weather in Kenshi is not a visual effect but a terrain tax you must pay in equipment to cross. Understanding it unlocks half the map.
General rules: who suffers, and how to be immune
Three principles to memorise first:
- Skeletons and all animals are immune to every weather effect. No exceptions, and no gear required.
- Hivers are immune to acid in all forms — acid rain, acid ground and acid water all do nothing. They still fear gas and burning, though.
- Step inside any building and you are immune to all weather. Standing on a building's top floor grants immunity to gas and burning.
And one more that is often misunderstood: damage reduction from Toughness does nothing at all against weather damage. A character with maxed Toughness dies in a gas cloud as fast as a rookie.
Acid Rain
The standard weather of polluted zones, dealing continuous stun damage to unprotected organic parts (it heals naturally and needs no bandaging).
Protection does not need to reach 100%: 80% is enough for recovery to outpace the damage. Characters will nonetheless complain until protection is topped up to 100% — that is voice lines, not mechanics.
Main gear:
| Slot | Item | Protection |
|---|---|---|
| Body | Dustcoat | 80% |
| Body | Longcoat | 70% |
| Body | Sleeveless Dustcoat / Sleeveless Longcoat | 60% |
| Body | Crab Armour | 50% |
| Head | Crab Helmet | 60% |
| Head | Ashland Hat | 50% |
| Head | Sandogasa / Straw Hat | 40% |
| Camping | Flat Shelter / Mercenary Tent / Scrap Tent | 100% |
A single Dustcoat (80%) is enough to cross acid rain zones safely, which is why it is standard kit for long journeys; pitching a tent makes the whole squad completely immune out in the field.
There are more than twenty acid rain zones. The core ones are the Deadlands and the Iron Valleys (100% chance), with Darkfinger, the Howler Maze, the Iron Trail, The Pits, the Northern Coast, the Stormgap Coast and Fishman Island among the rest; the Burning Forest only gets acid rain during its "acid forest" season.
Acid ground and acid water: two separate traps
Acid rain gear will not save your feet, and it will not save your life in the water.
Acid Ground: in the Deadlands, the Iron Valleys and the Black Desert the ground itself is corrosive, dealing blunt damage to the legs. The fix is extremely cheap: any pair of shoes gives complete protection. Hivers and Skeletons are immune, and robotic limbs are unaffected.
Acid Water: at least four bodies of water are corrosive.
- The Deadlands: Acid Lakes on top of its acid ground.
- Vain: an acid river cutting through the middle of the zone — a genuine roadblock, so decide where you will cross before you set out.
- Stobe's Gamble: Crumbling Labs sits inside an acid lake; you have to swim through acid for a stretch to reach it.
- Sonorous Dark: Barrier Tower is ringed by acid water, and the gap that looks passable is not — you swim the acid and go round the tower.
Gas
The second-rarest weather type, appearing in only two places, with different forms and different toxicity:
- The Black Desert: small black clouds, more toxic. An unprotected Greenlander goes from 100 health to 0 in about 14 game minutes.
- The Ashlands: large white clouds, milder, around 20 game minutes.
The damage type is stun, applied to the chest at a fixed location (in extremely rare cases the stomach instead).
Protection options are pitiful: only three helmets give 100% — the Fog Mask, Mask Type III and the Swamp Ninja Mask.
No gas clouds spawn inside Cat-Lon's Exile, so masks can safely come off there.
Burning: the orbital beams of Venge
Exists only in Venge. During the day, large beams appear at random, move fast and last a few seconds (a few game minutes) before vanishing. They are said to come from an orbital station like the ruined one at The Eye — the wiki's own hedged phrasing, not a confirmed piece of in-game lore.
This is the only weather in the game that deals cutting damage: it does not heal on its own, and anything caught by it needs bandaging immediately (see Medical).
The best single item is the Dustcoat at 80%, plus Crab Armour 50%, Crab Helmet 60% and Armoured Hood 25% — no single item reaches 100%, so you either combine several or simply hide in a building.
Dust Storms
The most common weather, and the only one that deals no damage and only cuts stats:
- Melee Attack and Martial Arts −10
- Perception and Precision Shooting −33.5%
Those are the caps at strength 1.0; some zones are weaker and the penalties scale down proportionally. Unprotected characters raise an arm to shield their eyes — that is animation only and does not reduce the effect.
Dust storms also drastically compress the vision and hearing range of every unit, which makes them prime conditions for stealth, theft and ambush.
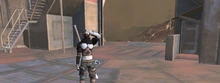
Protective gear is the most plentiful of the four weather types. 100% options include the Ashlander Stormgoggles, Fog Mask, Mask Type III, Samurai Helmet, Square Goggles and Swamp Ninja Mask, while the various head wraps (Tagelmust / Turban) give 70%. The highest-frequency zones are the Purple Sands (100%), the Great Desert (77.6%) and Skinner's Roam (76.2%).
For a sense of how fine-grained zone weather data can get, the Shek homeland of the Stenn Desert is a good example: its average wind speed is among the highest on the continent, it is in a dust storm roughly 15% of the time, and it gets no rainfall at all, all year[V1 0:08:24]. The three figures cause one another — high wind, no rain, and nothing left on the surface but sand to blow around. For a player planning a base there, the set is simultaneously good news and bad: wind power is superbly efficient, but farming depends entirely on wells.
Mechanics that do not exist: temperature and radiation
The wind speed, rainfall and groundwater figures in zone data only affect wind power, crop yield and well efficiency, not character health.
Seasons and cycles
A year in Kenshi is 100 days. Most zones have only one season; a few rotate through several in a fixed length and order. The season determines which weather a zone gets — the Burning Forest only has acid rain during its "acid forest" season, while the Black Desert has a dedicated "gas" season.
So "is this zone dangerous" sometimes depends on which day you arrive. Choosing a base site means looking at the worst season of the year, not the weather on the day you scouted it.
Quick reference
| Hazard | Damage type | Immune races | Cheapest answer |
|---|---|---|---|
| Acid rain | Stun | Skeletons, Hivers, animals | Dustcoat (80%) or a tent (100%) |
| Acid ground | Blunt (legs) | Skeletons, Hivers, animals | Any pair of shoes |
| Acid water | Direct damage | Skeletons, Hivers | Go around (armour does nothing) |
| Gas | Stun (chest) | Skeletons, animals | Fog Mask / Mask Type III / Swamp Ninja Mask |
| Burning beams | Cutting | Skeletons, animals | Hide in a building |
| Dust storms | Stat penalties | Skeletons, animals | Turban (70%) or better headgear |
Related articles: Medical, Limbs and Prosthetics, Hunger and Food, Skeletons, Hive, Locations, Game Mechanics.
Video citations
- Why is Vain Red? - The Science of KenshiHeroInHisHead