
Base BuildingReport
English:Base Building / Outposts · Game Mechanics
Building your own outpost outside the cities is Kenshi's mid-to-late-game spine. The site determines your resources and your enemies, walls determine whether you can sleep, and taxes and raid events depend on nothing except whose turf you built your home next to.
- Buy a house in town first, or head straight out into the wilds
- Choosing a site: what Prospecting is actually looking at
- The construction process
- "Put up a small house first": the order of outpost registration cannot be wrong
- Save-and-reload: the construction system's invisible step
- Manual placement and terrain modification
- Walls and gates
- Water and power
- Turrets
- Defensive flow: designing the base as a corridor
- Why you are being attacked
- Making the base run itself: the jobs system
- Extended readings: what a base actually is in Kenshi
- Making the base look lived in
- See also
Building a base in Kenshi is not "unlocking a new game mode"; it is actively turning yourself into a marker on the map. The moment an outpost is finished, it appears in other factions' field of view: tax collectors will come, preachers will come, and so will the things that want to eat you.
Buy a house in town first, or head straight out into the wilds
Most people underestimate one thing: if you go out to break new ground without research, the only building you can put up is the Small Shack.
The safer approach is to buy a building for sale in a town first (the ruined version is cheaper; repair it with building materials afterwards), finish your research under the protection of the guards, and only then leave. To build a tier-two research bench you must first research Small House (2 books) to unlock the Storm House, then Tech Level 2 (6 books) — 8 books in total. The Storm House is the first building that can fit a tier-two research bench; its roof is usable and it has four times the space of a Small Shack.
Choosing a site: what Prospecting is actually looking at
Send a character to hit Prospect; the scan range and precision depend on his Science skill. The results come in two kinds:
- Environment — the percentages for arid / green / swamp, determined by the "zone" rather than the site; it is the same anywhere you walk in the same ecoregion. It determines which crops will grow.
- Site figures — water (well efficiency), fertility (farm efficiency), stone, iron, copper (mine efficiency), varying with exactly where you stand.
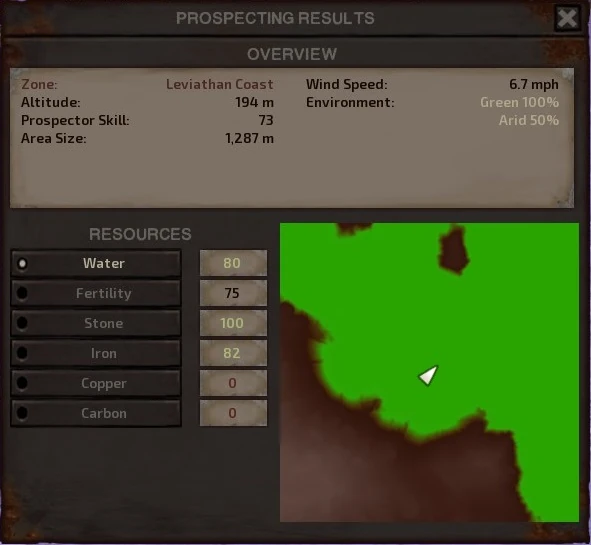
Beyond the numbers there are three further questions: whose turf is this (the United Cities send tax officials, the Shek want tribute, the Holy Nation wants prayer days, the Hounds simply extort you, and even ruins may trigger a visit from the controlling faction); what beasts are nearby (Beak Things and Gorillos are a source of skins and meat, and also the reason your workers get eaten); and is there enough wind (a permanently windless area leaves you no option but the biofuel route).
A few examples of getting the site wrong
HeroInHisHead's building series has left plenty of records that can be used directly as cautionary tales. The most common failure is circling for a whole day and still finding nowhere to build: however good the scenery, if stone, iron and copper are all empty, the place is simply unusable as a base[V1 0:02:45].
More painful is finishing construction and only then discovering the figures are wrong. He had one base where, after everything was complete, he noticed the surroundings were all copper and almost no iron; the remedy was to place automated mines on iron nodes at 44–53% just outside the rear wall — the machines are not attacked by raiders, and with automatic hauling you can pull the output straight out of the machine's inventory while standing on the rear wall, without actually leaving the base[V2 0:50:46].
The environment determines whether you can be self-sufficient. Open flats like the southern end of the Stenn Desert will grow almost nothing but cactus, and water has to be produced with wells and water towers[V3 0:06:46]; a mountain base, meanwhile, may have only one ridge on the whole mountain with usable ore figures, forcing every mine to be crammed in there, with fertility near zero and food restricted to hydroponics — in exchange for the steady strong wind and ample rainfall of high altitude[V4 0:39:40].
Finally, choosing a site means choosing your neighbours. While working in the World's End mountains, outside Rebirth, Holy Nation patrols came straight to him and had to be dealt with first, or the entire construction sequence would be interrupted[V4 0:00:09].
The construction process
Construction requires Building Materials on your person to begin. When placing, the ghost model comes in three colours: blue = too close to a town (or this is an indoor object), red = terrain does not fit, green = buildable.
Once confirmed, a wireframe appears, and the rules from then on are quite relaxed: materials are "thrown into" the wireframe, they do not need to be gathered all at once, and anyone can contribute, so you can start work and go back to town to restock. Characters assigned to engineering as a standing job will automatically fetch materials from the nearest storehouse.
Building materials can be bought from building traders (averaging around 108 Cats) or produced yourself: stone mine → Stone Processor (2 raw stone → 1 building material).
The research ladder for building shells is: Small Shack → Storm House → medium shells (6 books) → large shells (1 Engineering Research) → Outpost s-III / s-IV. The last two cannot be unlocked at a research bench alone; you must first buy the Advanced Outpost Blueprints, plus Heavy Foundations research, each costing 2 Engineering Research.
"Put up a small house first": the order of outpost registration cannot be wrong
Once you place the first building, the site becomes an official outpost, and you no longer need to re-place the town marker across saves and loads — unless you are adding functional facilities such as generators[V5 0:01:08]. This step sounds trivial, but it is the single most disaster-prone link in the whole construction process, because objects placed freely with the build menu (Shift+F12) do not register the outpost for you.
The consequence of skipping registration is that after a save is reloaded, the land does not belong to you: all the buildings become the property of the local faction instead, and you can neither demolish nor use them[V3 0:16:45][V6 0:00:42]. The safe order is therefore build one small house the normal way → place the town marker → save and reload → confirm every building belongs to you → only then touch Shift+F12; that small house can be demolished afterwards[V7 0:14:26].
Save-and-reload: the construction system's invisible step
Kenshi's construction workflow has a general rule that appears in no tutorial: newly placed or recently moved objects are only visual objects until you save and reload. At that stage characters will walk straight through them and doors and stairs cannot be used[V6 0:02:21], and textures flickering in and out as you move the camera are usually the same cause[V4 0:32:28]; only a reload truly bakes the buildings into the save[V8 0:02:14].
The same rule swallows more than you would think:
- Power — a wind generator placed without a reload will not actually start supplying power[V6 0:39:27].
- Turret mounts — for buildings placed with Shift+F12, the turret mount points stay at the coordinates from "when it was first spawned", so mounting a turret without reloading leaves it floating in mid-air[V9 0:18:54][V7 0:14:26].
- Selection hitboxes — for manually moved objects, the hitbox does not travel with them; you have to click their "original" position to select them[V8 0:02:14].
- Navmesh — a reload recalculates the nav mesh, which is why objects stuck inside other buildings, unclickable or undemolishable, can usually be rescued with a reload[V3 0:28:32][V10 0:22:25].
Conversely, a reload will also spit back out anything buried too deep: a building sunk too far into the ground gets ejected by the terrain on reload (three or four re-placements of the same house is normal)[V2 0:25:48], and an entire wall run can likewise be pushed clear above the ground, which shorter wall segments avoid[V11 0:00:35]. Walls built outside the outpost's permission radius will keep showing a ghost image and likewise need a reload to settle[V2 0:25:48].
Manual placement and terrain modification
The Shift+F12 build menu was originally a developer tool, yet it is the prerequisite for every base that "does not look like a player base". It has several limits you must know.
Spawn position must be close to the final position. Spawning something far away and dragging it over triggers the display bug where the building is only visible from certain angles and disappears from others[V10 0:22:25]. Sometimes a building will be placed and simply not render at all (apparently related to town marker boundaries); save and reload first, and if that fails, demolish and re-place[V11 0:00:35].
Ramps still need legal connection points. Even in free placement mode, ramps cannot go just anywhere; the practical approach is to place them somewhere with a connection point and then drag them to the target position[V4 0:32:28].
Embedding buildings into terrain
Half-embedding a building into a mountainside or a city wall usually still works: as long as that piece of terrain has no active navmesh (steep slopes mostly do not), the building hollows out and overwrites the spot[V4 0:01:17]. The success rate is not 100% — roughly 40% — and the crucial thing is that the entrance must be clear; as long as people can get in, the interior terrain is usually erased, leaving a complete usable space[V8 0:09:06]. This is the technical prerequisite for Kenshi's "carved into the cliff" vertical cities.
Retaining walls: making terraces out of walls
The most generally useful of these techniques is sinking wall segments into a slope as terracing. It solves three problems at once — uneven terrain, awkward walkways, and a loose-looking layout; testing shows navmesh on ramps, bridges and wall tops all works as normal, and characters can run up them without trouble[V6 0:23:54]. The method is one layer of wall, one row of buildings, then another higher layer of wall, stacking up a terraced hill city; the walls simultaneously hide the undersides of floating buildings and flatten out broken terrain in passing[V4 0:02:23].
Depressions in the terrain can be paved over with pontoon bridges, and this is not merely cosmetic — gaps between wall and ground let characters or Garru get wedged in, and once stuck they starve to death in there and cannot be pulled out[V10 0:27:59]. Pontoon bridge pieces can also be used to patch pathfinding breaks, while the ramp built into a stilt house can be swapped out for a stairs piece[V12 0:06:40].
Walls and gates
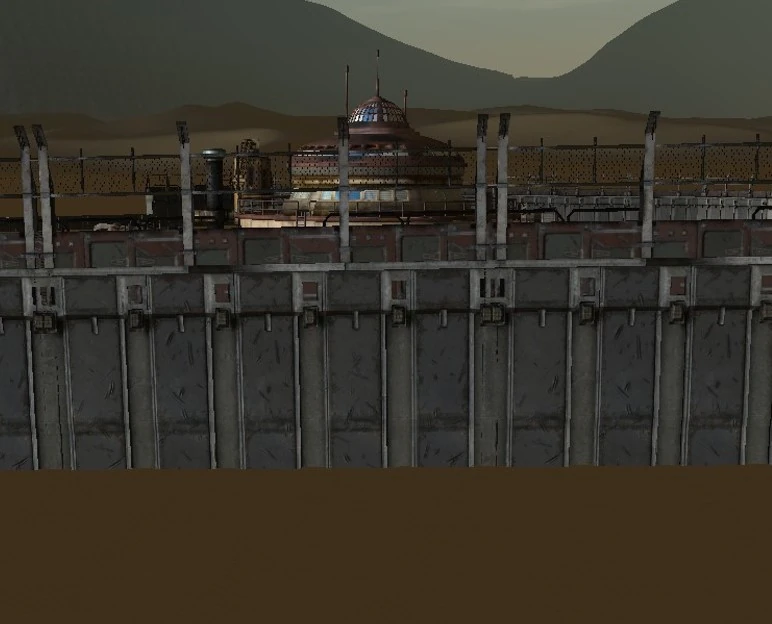
Walls do not merely stop people; they cut off the world outside — without walls, roaming beasts and bandits will interrupt everything you are trying to do, continuously.
| Tier | Materials | Build time | Turret bonus | Notes |
|---|---|---|---|---|
| Temporary wall | 1 | 1 hour | — | Cannot be stood on, cannot mount turrets |
| Defensive Wall II | 2 | 2 hours | 0% | Can be manned and mounted; defenders exposed to bolts |
| Defensive Wall III | 3 | 3 hours | +10% | Has crenellations, partial cover |
| Defensive Wall IV | 4 | 4 hours | +20% | Has embrasures and fixed turret emplacements |
Gates are the weakest point, and gate durability is calculated separately: temporary 15, tier two 30, tier three 60, tier four 90 (5 / 10 / 15 / 20 building materials).
That temporary walls have "almost no defensive value" is not hyperbole: they stop nothing and cannot be stood on, so before you research wall upgrades, turrets and siege tactics simply do not exist. The watershed for surviving the first raid is that one research[V13 0:00:32].
Placement order and shape
Walls are the worst-feeling components in Kenshi's construction system, and a few practical rules are worth remembering:
- Towers must always be placed before the wall, or they will not connect[V5 0:03:28].
- Whether wall segments come out whole or fragmented is random, generated according to alignment, and forcing symmetry often simply will not work; gaps left by walls directly cause enemies to pathfind straight through them[V12 0:06:40]. Use full-length segments wherever possible; walls chopped into short pieces are both ugly and hard to chain together[V5 0:03:28].
- Pick your wall model once and commit. Wall Two has no matching tower variant, and discovering that partway through means tearing the whole run down and rebuilding; also, the gate on the "big" variant is placed where you click rather than dragged like ordinary walls, which makes positioning far easier[V10 0:01:15].
- Fold the wall inwards toward the gate into a V shape, so that archers and turrets on the wall can hit enemies pressed up against the gate; if the wall runs in a straight line, enemies attacking the gate sit in a dead angle[V9 0:17:15].
That said, terrain is sometimes a wall in itself. Notches and drops on a mountainside invalidate the pathfinding mesh so enemies cannot get around that way — a free city wall[V9 0:25:34].
Water and power
Water has only two sources: wells and rainwater collectors, stored in water towers or tanks for irrigation, cooking and brewing. Characters themselves do not need to drink — Kenshi's deserts will not dehydrate you.
| Well | Cost | Workers | Power draw | Efficiency |
|---|---|---|---|---|
| Well I | 5 building materials | 1 | 0 | 75% |
| Well II | 6 building materials + 4 iron plates | 0 | 8 | 100% |
| Well III | 9 building materials + 6 iron plates | 0 | 10 | 125% |
Upgrading to a tier-two well is well worth it: besides the efficiency gain, it needs no worker at all.
Power has two routes. Wind — Small Wind Turbine 25, Wind Generator 50, Wind Generator II 100 (1 power per 1% wind speed); no fuel, but at the mercy of the weather, so batteries are mandatory. Biofuel — Small Generator 40 (upgradable to 70), Generator II 100 (130 after the boost research); fuel is made in a distiller from wheatstraw, greenfruit or hemp, of which hemp is the fastest to grow. A Generator II at full load burns about 6.55 units of fuel per day regardless of load.
Battery banks can be reinforced four times through the Battery Power research, +10 each time, and no rebuilding is needed — it takes effect the moment the research completes.
What the actual scale looks like
Three demonstration bases happen to represent three power situations:
- A small fortress: one generator is enough to support the entire settlement, because all turrets firing draws only about 30 power[V3 0:06:46].
- A windy city: wind generators supply about 100 power each, so three totalling 300 sustain the whole city. The generator area is deliberately placed at the very rear, separated from the built-up area, so a raid does not cut power immediately; the turbines need adequate spacing between them or the blades clip through one another[V5 0:44:20].
- An area with poor wind — the Gut has unstable wind, so turbines never reach full efficiency, and solar is "too advanced for this sort of scrap-picking settlement", so in the end the only option is stacking more units to force it through[V6 0:39:27]. By the same token, Venge has little wind to begin with, so that base put the entire power draw of six multi-barrel harpoon turrets on fuel generators, keeping only two wind units worth about 19–20 power purely to run the street lights[V2 0:38:42].
Farming and water are directly constrained by terrain: ground covered in rubble cannot take farm plots, so you must pick level spots to cultivate, and the crop types still depend on fertility; for water, a powered well plus a water tower is enough, and there is no need to place a tier-one well that requires a worker[V5 0:38:49].
Turrets
The operator's Turrets skill determines everything: accuracy 25% at level 0 and 125% at max; rate of fire likewise 25%→125%; and friendly-fire avoidance is 0% at level 0 and hits 100% by level 50 — that is the stretch most worth training first. The higher a turret is mounted the stronger it is, while firing upwards from below is degraded.
Turret placement has to accommodate raid AI behaviour. After breaching a wall, attackers prioritise destroying whichever tower is shooting at them before pushing further in[V9 0:13:17]. That rule has two direct corollaries: ramps up and down the wall should be placed on the side away from the turrets, forcing enemies to detour, or your defensive depth is designed for nothing[V9 0:13:17]; and ramps should be as far from the gate as possible, so that after breaching the gate enemies must cross the entire settlement before reaching the archers on the wall — building the ramp beside the gate is considered the most common fatal design in novice bases[V6 0:16:08].
Defensive flow: designing the base as a corridor
The idea that recurs throughout the demonstration base series is treating the whole base as a passage that can only be advanced through in one direction. The techniques below can all be verified in game, but "whether you should build this way" is the channel's own design position, not a game rule.
The most extreme approach is to use the terrain as a funnel directly: the volcanic crater basin in the Fog Islands naturally has only two entrances, so wall one off and leave the other as a narrow canyon, and Fogmen can only pour in through that slit[V11 0:00:00]. A mountain base, meanwhile, mounts multi-barrel harpoon turrets on every terraced walkway, so attackers take fire all the way from the foot of the mountain to the summit, with the keep given its own separate gate — by the time the enemy reaches it they are covered in harpoons[V4 0:39:07].
The same thing can be done indoors. The base at Venge's gateway pushed part of a metal warehouse into the gate structure itself, forcing everyone entering to walk through a roofed passage lined above with turrets — beyond its defensive function, that stretch also serves narratively as a military base's entry checkpoint[V2 0:14:11].
On pacing, one commentator suggests adding another gate partway up the mountain path as a "sluice gate": when the force is being pushed back toward the keep, closing checkpoints one section at a time buys time for the wounded, and a turret above the gate creates crossfire on enemies inside the gap[V14 0:05:32]. The combat-tested version is to fall back entirely into the inner keep once the outer wall is breached, leaving two people on the crossbow platform as a rearguard to buy time, seal both gates, and wait for the members who were out to come back with mercenaries and attack from the outside[V15 0:01:39].
There is also an extreme site choice that uses beasts as a moat: build the outpost deep in the Gut and let packs of Beak Things handle tax officials, bandits and raiding parties for you, with the corpses they leave behind doubling as a steady meat supply. The price is that your own characters need bodyguards just to go outside the wall to mine[V16 0:01:39].
The AI's own holes cannot go unmentioned either: enemies who break into the keep will not climb above the ground floor and eventually walk out on their own — which makes "pull everyone into a multi-storey keep" an unusually effective survival measure[V14 0:01:38].
Why you are being attacked
The old "Base Assault" system has long been deprecated, and the Events system has taken over; you can see the countdown on the right side of the faction window. Raids come in five kinds:
- Tax type — they come simply because you settled in their sphere: United Cities tax officials, Shek tribute rounds, Holy Nation prayer days, Dust Bandit extortion, Traders Guild visits.
- Suppression type — your relations with that faction are bad enough, or you refused to pay tax.
- Retaliation type — you won the last wave, or you killed someone important to them. The scale grows each time and can repeat indefinitely; touching a top-tier figure brings their leader out in person at the head of a force.
- Indiscriminate raids — unrelated to relations, purely about where you live: Cannibals, Skin Bandits, Crab Raiders, Fogmen, Blood Raiders, slave traders.
- Roaming squads (Base Attacks) — squads spawned in the wilds that find you on their own; the frequency can be adjusted in the game options.
If you are already allied with certain factions, allies will send reinforcements when specific hostile events trigger — but too far away and they will not arrive in time.
The escalation curve in stream records is quite vivid: after founding an outpost, Starving Bandits came first, then Black Dragon Ninjas broke down the gate, then the Dust Bandits came round again — and the system pays no attention whatsoever to the fact that you were flattened by the previous wave and are still recovering (that run was on a Genesis mod save)[V17 0:06:36].
Making the base run itself: the jobs system
Hold Shift and right-click to assign jobs; characters attempt them from the top down and skip to the next when one cannot be done. Four broad categories: first aid (which keeps working even with Jobs switched off), work (machines and farms), automatic hauling (moving output into the matching storehouse) and collection (carrying corpses to the crematorium, looting downed animals).
NPCs with no assigned jobs do not just stand around: they walk to the nearest idle spot (cushions, tables and chairs) to rest or chat. So laying out furniture and seating around the base makes the whole settlement "come alive" on its own[V5 0:51:01]. In a Genesis mod stream, the author went a step further and hired "settlers" as permanent residents of the base — they stay far longer than bodyguards, join the defence as if protecting their own home, and can be cleared out afterwards with a save import[V14 0:02:11].
Extended readings: what a base actually is in Kenshi
The following are the views of channels and commentators rather than game canon, but they explain "why player bases always feel slightly awkward in Kenshi".
Developer Chris Hunt himself is blunt about it: Kenshi was never a city management game; the core is your squad and their adventures, and the base is merely a fortress you can retreat to, not an invitation to be mayor[V18 0:14:50]. HeroInHisHead infers from this that the developers showcasing the construction system so heavily is a kind of smokescreen — because that is precisely the least important part of the entire game[V18 0:14:50].
There is an opposing reading too. Some commentators hold that Kenshi's real appeal lies exactly in role division and automation: you can assign the tasks out and let the outpost run itself as a trading house, an army, a farm, a slave business or a drug workshop — the way you play is something you define yourself rather than something the game hands you[V19 0:09:19].
Between the two readings sits one universally acknowledged problem: late-game defensive collapse. Six to eight multi-barrel automated turrets and an incoming force is wiped out before it can even touch the gate; players who know they are absolutely safe inside the walls stop wanting to go outside, raids degrade into ignorable noise, and the late game actually becomes boring[V20 0:05:31]. The same commentator lays out the loop more fully in a sequel wishlist: squad members in the base neither eat nor drink nor interact, only stand in place until they starve; defensive options have been nothing but harpoon volleys for years; and by day four hundred it has become the repetitive chore of "a pile of corpses and flies in front of the gate". He wants the sequel to add traps, mines, portable turrets and mounts to break it[V21 0:05:00].
Making the base look lived in
This section collects the aesthetic principles HeroInHisHead argues for repeatedly. They are purely personal design opinions with no effect whatsoever on game numbers, but they are the difference between "a pile of houses" and "a city".
Height variation is the biggest single variable. He argues that the reason so many of the enormous bases people build in Shem or Okran's Pride look like a pile of houses rather than a city is simply that every building is a single storey and all the same height[V2 0:31:25]. Deliberately mixing towers and buildings of different heights fools the eye and makes the base look more complex than it is — the reasoning being that Kenshi's inhabitants would not build a flat city on flat ground; they build along the terrain[V10 0:35:08]. A base where every roof is the same height is not ugly, but it is boring[V4 0:02:23].
Lighting is the highest-return finishing job. The guideline is one or two torches per entrance and the rest distributed in a regular pattern rather than scattered at random; too dark and the whole thing is dead and flat, too bright and everything is overexposed and cancels itself out[V6 0:44:25]. He says lighting up after dark takes a seven-or-eight-out-of-ten base straight to a ten[V4 0:38:33], and also makes the whole base look like someone actually lives there[V10 0:35:08].
Patch holes with buildings, not with walls. Joining houses to each other to seal the gaps makes both the flow and the appearance of the whole base far better than a bare ring of wall[V11 0:09:57]. In the same spirit, his construction process is to fix the gate position first as the centre point and then grow outwards, anchoring both ends of the wall to towers, and deliberately following the rise and fall of the terrain rather than flattening it — on the grounds that this is what makes it look like real people built it[V8 0:01:41].
Stylistically he prefers old imperial components. His reasoning is a setting-level one: Kenshi's inhabitants rarely build anything from scratch, the ground is littered with sturdy concrete buildings left by the First Empire and the Second Empire, and the rational thing to do is take them over and reuse them[V8 0:15:48].
The extreme expression of this line of thought is the whole background he invented for that base in the Gut (which he explicitly calls headcanon): a group of settlers took over walls and towers left by the Second Empire, then added swamp-style scrap architecture on top, and now live by catching, taming and selling Beak Things and bonedogs, calling themselves the "Gutters" — an economy built entirely on Beak Things[V6 0:51:04]. The game has no such faction, but it demonstrates what base building is really for in Kenshi: filling in, for your own save, a stretch of history this world never wrote.
See also
Video citations
- Kenshi | WE NEED SOME LAND!! | Let's Play Kenshi Genesis (Ep. 2)HeroInHisHead
- Kenshi Base Building - Gate of VengenceHeroInHisHead
- Kenshi Base Building - Shek Storm FortressHeroInHisHead
- Kenshi Base Building - Dwarf FortressHeroInHisHead
- Kenshi Base Building - Lagoon CitadelHeroInHisHead
- Kenshi Base Building - The GutterHeroInHisHead
- Kenshi Base Building - Hounds Hashish FarmHeroInHisHead
- Kenshi Base Building - Holy Nation River CityHeroInHisHead
- Kenshi Base Building - Mountain HiveHeroInHisHead
- Kenshi Base Building - Anzai's VaultHeroInHisHead
- Kenshi Base Building - Beep's Fog HavenHeroInHisHead
- Kenshi Base Building - The Arena of KralHeroInHisHead
- Kenshi | MOVING DAY....AGAIN!! | Let's Play Kenshi Genesis (Ep. 4)HeroInHisHead
- Kenshi | TAKING THE FIGHT BACK TO THEM!! | Let's Play Kenshi Genesis (Ep. 5)HeroInHisHead
- Kenshi | GOLEMS ARISE!! | Let's Play Kenshi Genesis (Ep. 6)HeroInHisHead
- Kenshi | The Nugget Mafia (Ep. 2)HeroInHisHead
- Kenshi | IT'S NOT GETTING EASIER!! | Let's Play Kenshi Genesis (Ep. 3)HeroInHisHead
- Kenshi 2 - What We Know So Far and What We Can ExpectHeroInHisHead
- WELCOME TO "KENSHI" - Expect No Favors Here!HeroInHisHead
- 5 Things I DON'T Want To See In Kenshi 2HeroInHisHead
- 5 More Things I Want To See In Kenshi 2HeroInHisHead