
Money MakingReport
English:Money Making · Game Mechanics
From looting corpses to running a steel mill — the actual numbers, risks and skill side-benefits of the mainstream income methods at each stage of a Kenshi playthrough.
- Methods by stage
- Early: your assets are other people's corpses
- Mining: the only income you can leave running
- Mid-game: smuggling and theft
- Mid-to-late: withdrawing cash from the wilderness
- Late game: turning the base into a factory
- Your own counter: customers can only afford food
- Common misconceptions
- See also
Kenshi has no quest rewards and no gold drop tables. All income comes from carrying something to a person willing to pay for it; the only difference is whether you are carrying junk off a corpse or steel bars off your own production line.
Before picking a route, ask one question: are you going to build a base? If not, do not touch Labouring or crafting — you will never use those skills; concentrate on scavenging and trade runs, where the Athletics, Strength and combat you pick up along the way are the real payout. If you are building a base, early mining and manufacturing are income and skill investment at the same time.
Methods by stage
| Stage | Method | Income per unit / job | Risk | Skills trained |
|---|---|---|---|---|
| Early | Lure bandits into town guards, then loot | A few thousand Cats per group | Low | Athletics, Strength, combat |
| Early | Looting gear in Bast (United Cities vs The Holy Nation brawls) | A few thousand Cats per fight | Medium | Strength |
| Early | Selling people to slave traders | 400 Cats per head (500 Cats if handed to Rebirth instead, or +1 Holy Nation relations) | Low | Strength |
| Early | Mining copper | Depends on the markup | Low (mines are in the wild) | Labouring, Strength |
| Early | Random bounties on wandering bandits | About 2,000 Cats | Low | Strength |
| Mid | The booze loop trade run | About 7,000 Cats per lap | Medium | Athletics |
| Mid | Hashish smuggling | 75% at source → 1200% at destination | Medium-high | Athletics, Stealth |
| Mid | Stealing blueprints and booze | Thousands of Cats per item | High (that shop is lost forever) | Stealth, Thievery, Lockpicking |
| Mid | Raiding Beak Thing nests for eggs | 4,200 Cats each | High | Athletics, Stealth |
| Late | Scavenging ancient ruins | CPU Unit 6,000 Cats, Power Core 3,000 Cats | High | Combat |
| Late | Leviathan Pearls | 12,000 Cats per beast | Extreme | Crossbow, Turrets |
| Late | Named bounties | 20,000–100,000 Cats | Extreme | Combat |
| Base | Refining Skeleton Repair Kits | 2,274 Cats each | None | Robotics |
| Base | A Steel Bar production line | About 33,048 Cats per day per refinery | None | Labouring, Science |
| Base | Mass-producing Bandanas | About 272 Cats per hour | None | Armour Smith |
Early: your assets are other people's corpses
Early characters cannot beat anything, so the standard play is borrowing a blade: lure a hostile squad in front of the town guards, wait for the fight to resolve, then move in and loot.
- Take only the expensive things. When your inventory fills up, stuff the rest into an unconscious bandit and carry him into town to sell as well.
- Do not loot townspeople. Taking from a hostile faction is fine; taking from neutral townsfolk is theft (see Bounty and Crime).
- Do not wear gear with a faction uniform tag. That faction will see through it, and other factions will mistake you for an enemy.
- Bast is where this play peaks: large United Cities and Holy Nation squads brawl there constantly. Wait until one side is entirely down and then move in, prioritising Holy Nation gear — the nearby towns are all United Cities, so fencing is not a problem. "Wait until one side is entirely down" is not a figure of speech: rifling through a corpse while their comrades are still standing gets you treated as an enemy on the spot (see Game Starts).
- A battle between factions is a free supply depot in the early game. You do not have to engineer the conflict; just walk into one. In one playthrough the plan was to raid the Band of Bones for food, and on arrival Kral's Chosen were already beating them up, so the player simply stood to one side until it was over and then walked in and took the food (knocking anyone who got up back down again)[V1 0:07:08]. Short of both money and food, this is the lowest-risk resupply there is.
- People in cells do not complain. Town police stations have holding cells with prisoners in them, and their belongings can be looted like anyone else's — the person is chained and cannot resist, and afterwards nobody reports it[V2 0:03:25]. The one thing to watch is still the guards' line of sight: theft seen is theft (see Bounty and Crime).
- There is money on a body twice. Strip a knocked-out outlaw of his gear, then carry the man himself to a slave trader — two payouts on one trip[V2 0:10:10]. One playthrough industrialised the route: using that cash to buy Hive slaves, putting them into hemp fields and Hashish production, and turning one-off scavenging into a drug production line — also the most direct way to connect early grey income to the mid-game smuggling route.
Do not buy gear early on. The buy/sell spread is brutal (see Economy and Trade): loot what you can, and where you cannot, make do with Prototype or Shoddy light armour.
Mining: the only income you can leave running
Ore deposits are all over the map, but Raw Iron is worth half what raw Copper is — so mine copper.
Each node supports 1–3 workers depending on its size, and holds a maximum of 5 units of output before it is full. The method is to find a town where copper is marked up over 100%, then find the nearest, highest-quality node, and haul with a stacking backpack.
Advanced version: research electrical crafting and turn 1 raw copper into 1 Electrical Component (about 216 Cats), a net gain of roughly 40 Cats each, though it needs power.
Mid-game: smuggling and theft
The price logic behind trade runs lives in Economy and Trade; this section is only about execution.
The booze loop: buy Cactus Rum at The Hub → sell in the Swamp and buy Sake → unload in the United Cities and buy Grog → return to The Hub. About 7,000 Cats a lap. The recommended spec for a trade character is still able to run above 22 mph while loaded, carrying a squadmate whose backpack is also full; short of Beak Things, if you can outrun it you are safe.
Theft gets you things you cannot afford, blueprints and booze first among them. Train Stealth and Thievery first — once a shop catches you, that shop is closed to your entire faction permanently, and swapping characters does not help. The standard method is to hide inside the shop during the day and wait for closing time, then work once the owner has locked up and gone to sleep. Stolen goods should first be laundered in a specialised container (armour storage, crossbow locker, item furnace), or they only sell for half price.
Mid-to-late: withdrawing cash from the wilderness
| Target | Unit price | Notes |
|---|---|---|
| Leviathan Pearl | 12,000 Cats | Pups drop the same pearl and are far weaker |
| Fog Prince Head | 6,000 Cats | Any merchant will buy it |
| CPU Unit | 6,000 Cats | Common in ruins |
| Beak Thing Egg | 4,200 Cats | 6 kg each; four in the inventory is 24 kg |
| Skeleton Repair Kit | 4,341 Cats | Common in ruins |
| Skeleton Eye | 3,600 Cats | |
| Power Core | 3,000 Cats | |
| Robotics Components | 2,838 Cats | |
| Skeleton Muscle | 1,944 Cats | About this much per Security Spider |
Raiding Beak Thing nests has the most absurd return rate of the mid game: 10 eggs = 42,000 Cats. The method is do not fight — send in a character with high Athletics or high Stealth at night, grab the eggs, run.
Fog Princes can be dealt with other than by storming the Fog Deathyard: sneak into a Fogman settlement, assassinate a single Fogman, hang him on a prisoner pole as bait, and ambush the Prince when he comes to feed. Failure usually does not alert the whole pack.
Late game: turning the base into a factory
The core fact about the crafting route: every step of refining adds value.
| Line | Input | Output | Net |
|---|---|---|---|
| Skeleton Repair Kit | 0.5 Robotics Components (2,838 Cats) + 1 Steel Bar (648 Cats) | 4,341 Cats | About 2,274 Cats each |
| Chainmail Sheet | 3 Steel Bars (1,944 Cats) | 2,527 Cats | About 584 Cats each |
| Steel Bars | Raw Iron + power | About 51 bars/day per Steel Refinery | About 33,048 Cats/day |
The value of a steel line is not the unit price but the fact that one character can run the entire chain — and, with the base laid out well, two or three Steel Refineries at once. The cost is upstream: it takes several Iron Refineries (III or IV) and Ore Drills III to keep them fed, plus the power to run all of it. The point of Chainmail Sheets is compression: three steel bars become one sheet, dramatically reducing weight and storage pressure.
Measured figures for clothing and weapon crafting (at Armour Smith 80, Weapon Smith 77):
- Bandana: 0.6 hours each, cost about 11.9 Cats, sells for 175 Cats at Standard grade, net profit about 272 Cats per hour — the best on the clothing bench, and up to 692 Cats at Specialist grade. Turbans run about 139 Cats/hour and Tagelmusts about 106 Cats/hour. Wool Hats and Human Skin Suits are loss-making.
- Past roughly Armour Smith 40, buy an Engineering Research (about 8,000 Cats from the Scraphouse) and switch to Heart Protectors: a little over three times the crafting time of a Bandana, and well over three times the profit.
- The best weapon is the Desert Sabre: cost about 675 Cats, and it sells for 942 Cats even at the lowest grade. The blueprint costs 12,000 Cats.
- Crossbows are the worst recommendation: a Specialist-grade Junkbow is 1,004 Cats, but it needs hinges, steel bars and 10 hours.
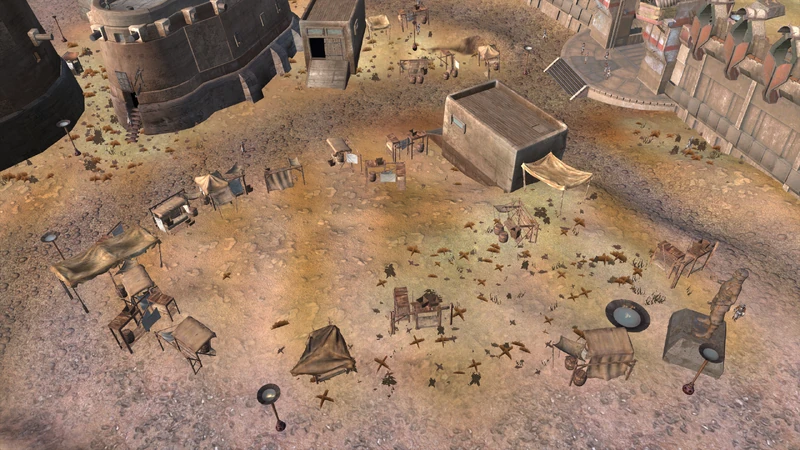
Your own counter: customers can only afford food
Once your base is up you can put out shop counters and let passing NPCs come and buy. In practice the ceiling on this income is not your production capacity but the customers themselves: an NPC's shopping list only covers food, first aid, narcotics, splint kits, misc and tools — weapons and armour are not categories they will ever buy — and resident NPCs are handed their Cats once, when they first load in, and never receive any more. About the only things that actually sell are cheap goods like food[V3 0:52:09].
So the correct use of a counter is not clearing stock but putting your own farm produce and booze on it. The sums are small but steady, and usually enough to cover the hire cost of garrisoned mercenaries — farmland paying for guards.
Common misconceptions
- "Iron is better, it is everywhere." Raw Iron is worth half of raw Copper, and mining loses to nearly every other method anyway — its one advantage is that you can leave it unattended.
- "Load up a cart and clear it all in a big city." A merchant's cash is a hard ceiling, and cash handed to townsfolk-type NPCs does not regenerate. What you plan is which shops to sell at.
- "Sell gear for profit." The spread on equipment is brutal; if you want to make money buying and selling, sell trade goods.
See also
Video citations
- Kenshi | WE NEED SOME LAND!! | Let's Play Kenshi Genesis (Ep. 2)HeroInHisHead
- Kenshi | The Nugget Mafia (Ep. 1)HeroInHisHead
- Kenshi Base Building - Lagoon CitadelHeroInHisHead